Wire Jewelry Fundamentals
This class has a run time of 60 minutes.
this course is a basic course for us it's to get you started with making wire
jewelry oftentimes this will be a prerequisite for other classes that you may take it shows or bead stores or here
at Beaducation so we're going to talk in depth a lot of information I'm going to give you today into wire metals
different gauges tools why to use wet wire how to use wet wire I'm just going
to babble and babble but I'm going to give you a lot of really good information the projects we're going to work on today is a bracelet of wire
wrapped links and this is great because you just have to make them over and over again to get the length for a bracelet
so it's a great way to perfect it we're also going to make some earrings before
viewing this the rest of this class you should go and check out the free demos that we're offering here on basic wire
loop and perfecting the wire spiral those are typically things I teach in this beginning class but we wanted to
offer them for free but you do need to master those before moving into the rest of the wire wrap loop so now I'm going
to teach you today so with the earrings I'm going to use those techniques the
spiral to make a spiral head pin and the basic loop to make the bottom of some ear wires you're going to learn how to
make your own ear wires you may be wondering with all these different techniques what's the scoop
with the wire wrap loop what's the big deal why would I use it basically it's used for attaching beads to chain or
other links of beads that sort of thing and the design options are limitless it's just a very strong and attractive
way to do that before we get started in the projects I want to talk a lot about different metals and wire and tools but
let's get started there's a large variety of metals out
there made into wire for us to make into wire jewelry their silvers and golds and
base metals let's start chatting about base metals so you will find down at your local hardware store some copper or
brass or steel to name a few they're great because they're less expensive than the others and really nice for
practicing with so you don't waste a bunch of money on just learning the technique for golds although you can
find really fine gold wire 14 K 12 K 24
K most commonly at bead stores and online you'll find gold fill wire and
what that is is a 14 karat gold layer heat and pressure bonded to a base metal
typically brass it's a really strong bond this won't rub off it holds up really nice isn't and is a great option
for gold jewelry without having to kick down the big bucks for the real gold and it's it's much stronger than a gold
plate there's definitely a difference gold plate will rub off it's a very it's much cheaper process so I recommend
sticking with the gold fill now for silvers I typically work mostly with
fine silver or sterling silver fine silver is 99.9% pure silver sterling
silver is an alloy mix of 92.5 percent fine silver and 7.5 percent base metal
typically copper new to the market is a metal called argenteum sterling silver
and that is a mix of 92.5 percent fine silver and instead of copper for the
other 7.5% they use a new rare element called germanium and because in sterling
copper is the element that causes it to tarnish and oxidize for a gentium because it uses germanium it's basically
tarnish free so that's pretty cool I don't have much experience with it because it's pretty new I stick mostly
with sterling sterling is definitely my favorite alright now let's talk about different
tempers of wire different gauges of wire and different shapes of wire most commonly you
why're round that's what most people use but it's also out there in triangle half
round flat square even patterned so those are fun but much more expensive
like I said most people use round for different gauges that refers to the size
of the wire so the higher the number the thinner the gauge so 26 and 24 gauge are
pretty fine pretty thin where 16 and 14 are much much thicker so the higher the
number the thinner the gauge got it okay so that's how you're going to find people referring to sizes of wire now
let's talk about the temper of wire that's referring to terms that you'll hear like dead soft soft half hard or
hard and I get the question in class most common question is when to buy half hard when to buy soft and what the heck
is a difference so generally you'll see them referred to as soft or hard or
maybe they'll say dead soft or half hard and it's referring to the softness the stiffness the springiness of the wire
dead soft isn't back at its natural state so after the sterling wire or whatever wire is fabricated they'll
bring it back to dead soft and from there they can harden it so some people prefer to use hardened or half hard wire
for things like wire wrap loops like we're making today if you needed to make them out of really thin wire if you had
a half hard wire it would be even stronger so tiny little wire tends to
get super mushy half hard will retain its shape a little bit better sometimes I use half hard 20 gauge to make ear
wires because you want the loop of the ear wire to stay really strong because it's already half hard it'll retain its
shape but you can make them out of dead soft and then hammer it to give it hardness so hammering it after you've
shaped it so really my answer to that question is it's project dependent it really depends what you're doing for
myself I work mostly with soft wire because it's a lot easier to harden it I can run it through my nylon jaw pliers a
couple times or I can hammer it or pull it through a draw plate which will shrink it and stretch it that's a little
more technical but you can always harden soft wire it's much harder to soften hard wire you have
to use a kiln or a torch so again project dependent but if you're going to invest in a whole bunch of wire I would
say go for the dead soft and then you can harden it as you need to the main reason I stick to dead soft is because I
do a lot of sculptural work and I do a lot of coiling and if you're working with half hard wire it's just going to
fight against you it's going to want to spring out of shape or if I just need the wire to mush into a place and stay
there dead soft is going to be better half hard will be a little frustrating I want to fight against me I'd like to
start by talking about the three basic tools that you need for most wire working projects we've got chain nose a
nice flush cutter and round nose definitely theirs uses for many many
other tools but we're going to get to those in the minute for now these are the must-haves so let's first talk about
chain nose what you want to look for in a chain nose is nice ground down in our
jaws of your plier you don't want to have the edges sharp this is a lindstrom chain nose we're going to talk about
quality later a nice ergonomic Berg anomic handle is always helpful and what
I really like about these is the very tiny tip you'll really really want that
with a lot of your projects where you're going to want to get into tiny little spots and the tiny tip on these guys is
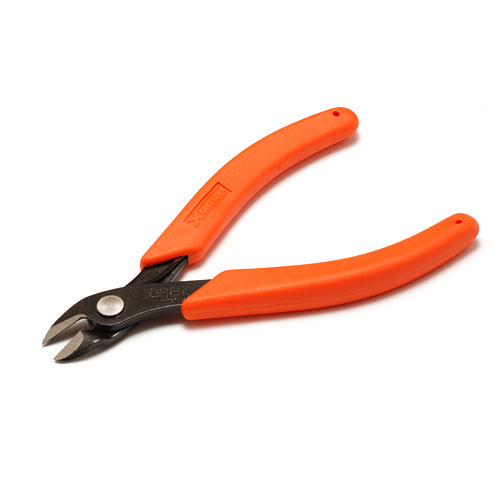
very useful next we've got our cutters
these are tronex cutters again we'll talk a little bit about these later I like to work with a flush cutter and
what that means is that when you cut your wire it leaves it really really flat not beveled like this you know the
edge your wire will be flat not beveled the difference there is well at least
what you want to look for on your cutter is the two blades where they come together will be flush there won't be a
big dip where they come together you want them to come across very smooth if
you cut your wire with this side it will come off beveled so on most flush cutters and it's a double flush cutter there will
only be one side that cuts flush so that's this side on these guys again we're going to talk a little bit more
about quality but take a look back there and when you cut your wire take a look at the wire that's another way to tell
if your flush cutter is cutting flush so the other thing I like about these guys is it comes to a nice pointed tip so
just like with the chain nose we just talked about I can get into a tight spot
next we've got our round nose and this is what we're going to use for making loops so each side of the jaw is round
completely round and I work with short
round nose like this for small loops but the one I work with even more is the German round nose it's long and I don't
care for the length of it the purpose really for me of this tool is this back
part of the jaw because it's got a big diameter in the jaw and I use these a
lot to make bigger loops so anywhere from about a three or four millimeter loop up to this is about eight or nine
millimeters so with pliers the longer
the jaw the weaker it is out at the tip so if I'm working with some heavy gauge wire maybe 18 gauge or thicker I don't
work out here with this plier again mainly I use it for this back part so if I want to make little loops I'll move
over to my short round nose where I've got the short option or the thinner options here to result in a smaller loop
or these guys for a bigger loop or for the heavier gauge wire way back here
especially so now we are going to move on to talking about the rest of the
tools that you may want to check out down here again are my must-haves really
like I said you need three pliers for most basic wire work projects a cutter a chain nose and a round nose but in this
case I typically will work with two round nose for the options of the size loop so these are my must-haves these
bad boys are with me at all times appear some optional pliers this guy is
called a flat nose and you can see why out of the tip of the nose it's flat rather than pointed like a chain nose
and it's ground down differently on all these edges here where I use it for
maybe grabbing wire and kinking it to make a very very sharp angle or I'll use it as a second hand maybe to hold a loop
still while I'm wire wrapping it so I'll hold the loop and wrap the tail with
another chain nose or flat nose it's just nice to have two flat pliers to hold things with the same kind of goes
for these guys over here these are bent chain nose so you can see the tip of the nose is bent but they do come to a point
out here just to different brands here bent chain nose and I use those again
sort of as a second hand or they really are great for holding jump rings to open
and close them you can use this outside angle here to get in nice and close
or when wire wrapping this angle here is great to get into funky tight little spots so those are great guys to have
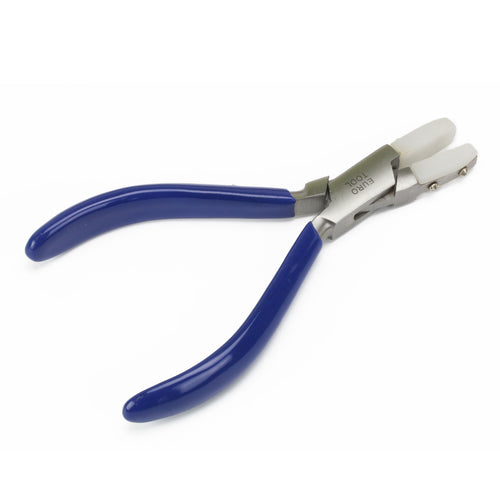
and this is a nylon jaw pliers eyes of the plier are nylon so it won't harm
your wire a lot of people refer to it also as a wire straightening plier because you use it to grab wire and pull
on it I'll show you this a little bit later to straighten it if there's any kinks in it originally they were mainly used for working with square wire where
you need to hold the wire still because the wire length is square you need to
hold on to it so that you don't get twists within that length of square and these won't mark up your wire but you
can you know get a good grasp on it without tweaking it these days a lot of people are using it to straighten wire
which is super super helpful again we'll get to that in a minute so now I want to move on to talking
about optional tools other than pliers hammers bench blocks that sort of thing
here are some other tools that you might find quite handy here we've got two
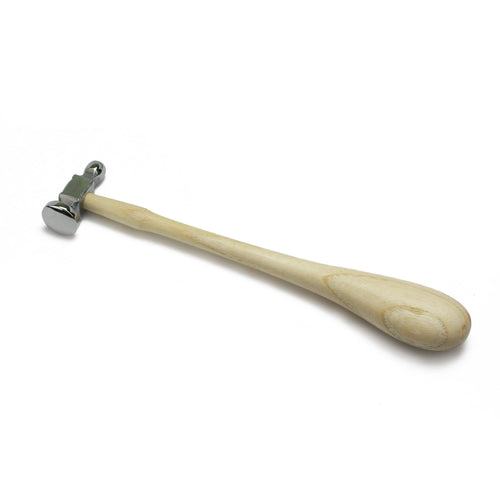
different types of hammers I'll start with this one this is a chasing hammer and got my little name on
there sorry and I use this for flattening I'll use it to flatten wire
to hardened wire to may be texture wire on the back here for forging various
things but what you want to look for here is a nice smooth head with slightly
rounded edges you'll find some hammers that are straight and flat and with
those guys if you catch the edge at all it will put a Mar and a nick in your wire these are just slightly rounded you
can't really see it real well there maybe you can on the camera but it the head of the hammer is slightly convex
it's not so convex that the center is really the only striking area it's just
a little tiny bit domed to soften out the edges and the surface here so that
you don't get nicks all over it and I use the back here the ball-peen part
just for texturing and stuff so you'll find a lot of different hammers out there that you might like this is the one I prefer it's just basic take
chasing hammer I use it for hardening or forging or shaping flattening this guy
is a nylon jaw no it's not it's a nylon hammer and it's made out of plastic
you'll see them also in rawhide it's basically the same idea which is we use
this to harden wire without flattening it so this you can take a wire and
Hammer it a whole bunch on your bench block and you'll see the difference in the wire it's difference up a little bit so it's hardening the wire but not
flattening it and shaping it may be like this guy will so this being metal on metal will really affect your wire this
is just going to harden it I use this for maybe if I make an ear wire and I
need to harden the top loop of it so it really keeps its shape but I don't want to flatten it I'll use this guy it's a
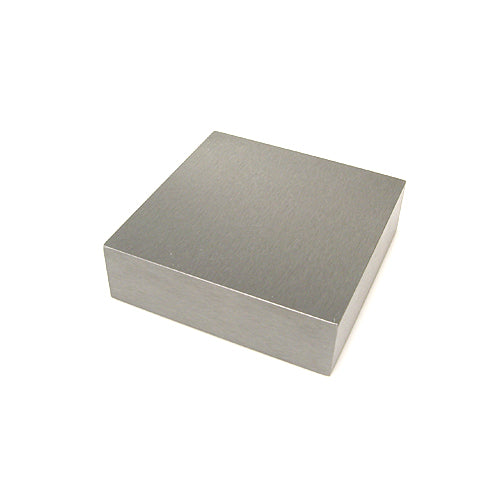
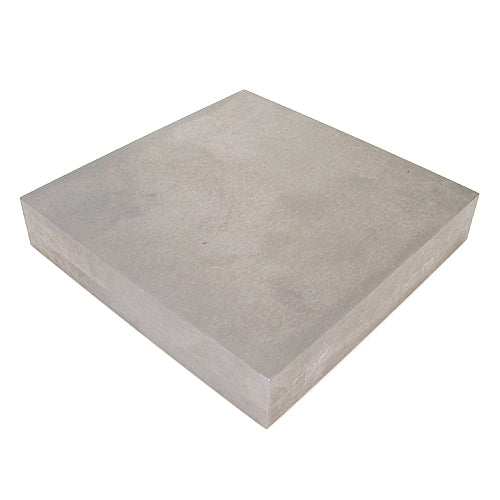
great effect there too this is a bench block it is just a little block of very
tool start tool hardened steel and you definitely want to find the ones that
are very hard the cheaper ones will be a soft metal and you get nicks in it a lot this is you know
I'm a little bit more expensive when the metal is harder so it doesn't get thrashed as easily
it also comes a little bit bigger you see them like four inch by four inch and a little thinner
those are great too I just like this one because it's a little more manageable and transportable and here is a ring
mandrel it's made out of steel and it's got the actual sizes written on here I
don't know if you can see there you see those guys on there so you can form your
ring directly on this mandrel it is steel so you can also hammer directly on
it this is um definitely optional but very useful for making rings I want to
back up a little bit here and talk about quality specifically about quality of pliers you will see them in a large
variety of quality and the great rule of thumb is just like anything else if they're super cheap they're probably not
good quality and what's going to happen there is they may leave a weird burr on your wire or not cut it flush maybe the
chain nose will dig into your plier because they're not well made not ground down well the round nose may have oval
shaped jaws instead of actually round so they'll thing those are things that you'll see and if you if you're starting
out with cheaper pliers just stick with it for a little bit if you're finding that those are affecting your finished
pieces might be time to step it up so I'll just show you a couple examples here these are Pakistan cutters
generally and I mean generally not always but generally the tools from
Pakistan sometimes China they will be a less quality tool moving up a step to the
German tools I really like the German tools I've had a pair of round nose since 1989 that still have held up great
I specifically like what they're doing new these days which is a nice ergonomic handle it feels very comfortable in my
hand which makes a big difference so they are ground down nice the tips come to a nice fine point it's a strong tool
and pretty affordable there and the Germans and then stepping it up Linstrom is one
of the highest quality hand tools that you can find I really like the Lindstrom I use the
chain nose flat nose round nose and cutter you'll also find other companies like Tronics and there's other companies out
there starting to make a nice high-quality tool the Lindstrom's one thing I want to point out is these long
ergonomic handles they feel really good in my hand I especially like the length so there is a nerve in your hand right
about here that can get a little fatigue in your hand by hitting it a bunch so
these guys they go a little longer for me and it makes the tool lighter these are really light that makes a big
difference when you're plunking out a lot of chain mail or something and you know it'll help preserve the life of
your wrists I really like the Lindstrom's for that and you will find
them with ergonomic handles like here's my ergonomic cutters but I've had these
cutters Wow look at those boys I've had them since about 1991 and they still cut
great it was before they came out with a ergonomic handles it's the exact same
cutter just two different handles so you're going to pay a little bit more for these but I find them more
comfortable but this is proof that they
last forever even when they're dirty Thanks so that's a little bit about quality I
want to show you exactly why you want a high quality cutter so stick with me I
think one of the very most important tools you can invest in as far as having a good quality tool is your cutters here
we've got a large variety of them these are the cheapo ones these are really
nice it's as our own cutter they're nice and pointed and flesh I really like these guys this at one point was a nice
cutter but I did something here that broke it can't really focus in on it do
you see that little divot out of the jaw there I don't remember what I did perhaps I can blame it on my husband but
maybe not but this tool is not it doesn't have the strongest possible jaw
here and if you cut something you're not supposed to be cutting it will ruin your tool there's proof of that you know they tool they
tool harden and steal as much as possible but with these tiny little blades at the end there's only so much they can do so don't abuse and ruin your
cutters like I did on these boys and I really prefer the Tronics or the Lindstrom and I just want to show you
I'm going to compare these two I want to show you exactly why you might want to
invest in a high end good quality flush cutter you can already see here that
these guys the cheaper ones are super bulky out at the end so you're not going to be able to get into tight spots these
are much more fine come to a nice pointed tip there and I really use that to cut a cup cut apart coils or to get
in to cut the tip off of a nice tight wire wrap and I want to show you the difference between the the cuts so I've
got here a piece of 14 gauge copper wire and I'm just going to cut a tiny bit off
so you can see how these guys leave it really pointed see how that tip there is
comes to a point rather than flat and
now with the flush cutter remember with a nice quality flush cutter anytime you
cut a wire don't cut it out at the tip like this if you're just cutting a bit off because you don't you want to preserve that tip let's cut it a little
further back in the jaw here this guy
will leave it's a lot look at that nice and flat not pointed and that's really
important for if you are making jump rings or you're making an open-loop chain because you're going to want your
wires to come around and butt right up against each other if they come together like this that's very dangerous they
could easily open up and your chain could fall apart so you want two flat ends to come right next to each other so
you can see the benefit of having a nice flush cut
here we're taking a look at the projects we're going to work towards so even though this is a technique based class
we're going to design towards some finished pieces here so you can walk away with something and within these
finished pieces you learn a lot of techniques there's perfecting the spiral basic loop at the bottom of our ear
wires how to make an ear wire and harden it lots of wire wraps so we're going to
cover a lot today here's what you'll need to work with we've got ten
freshwater pearls they're about five or six millimeter twelve four millimeter
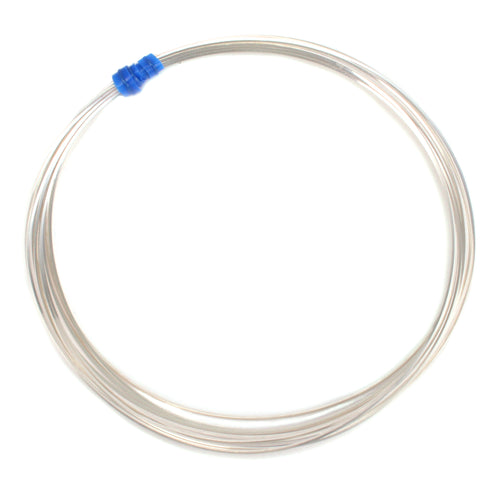
swarovski bicone crystals this piece of wire here is six inches of 20 gauge
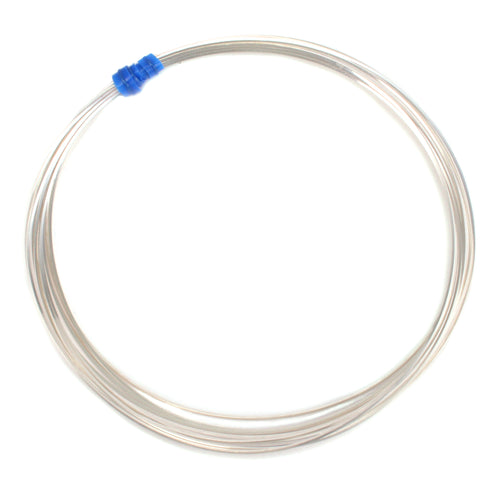
sterling that can be dead soft or hard and this is five feet of 24 gauge dead
soft sterling definitely want dead soft there and a clasp feel free to substitute any beads in there just keep
in mind if you're working with larger beads your links will be longer so you might need less wire and if you're
working with smaller beads your links will be shorter so you probably need more wire
before we get started on our project I just want to inspire you with some different design ideas all these here
these this necklace and this necklace are constructed with wrapped loops this one is gold fill wire and some big sassy
beads over here it's sterling wire a little bit thicker and wrapped into some
Bolly silver components with some dangles that are also wire wrapped onto
the circle components up here this necklace is a little more advanced wire
work in it but the centerpiece is wire wrapped on it's just a spiral head pin
with a wire wrap at the top which you can do with any bead and we're going to learn how to do that when we make the
earrings the interesting thing here though is that this hole was pretty big so I used a bead on the bottom and a
bead on the top to kind of clog the hole so the wire didn't shift back and forth within the hole of the bead and it sort
of stabilized the pendant a little better
another great design idea is to use sections of chain and connect them with
wire wrap links that way you can incorporate some beads here and there this necklace has used chain in these
sections here and it's a lariat it pulls right through this circle down at the
end here a couple those briolettes are wrapped and that's a little bit different than the the wire wrapping
we're showing you here today look for a class on briolette wrapping coming up soon
all right so let's get started making your wire wrap loops I work right off of
the coil of wire or spool of wire if I have it I find there's less waste that way if you want to pre-cut the wire
because it's a little awkward for you to work off of the spool then go ahead and cut about three inches when I pull it
off it's a little funky there so I'm just going to straighten it with my nylon jaw pliers and I'm going to start
with about one inch down on my wire I'm going to start with my chain nose I'm
going to grab about an inch down and rotate my pliers the side to give it a nice sharp right
angle you're now going to come in with your round nose those are the guys with
the round jaws for making loops and put one side of the jaw right in the bend right here and squeeze down right on top
of it now I've got it pretty far down my jaw because that's the size loop that I
want to make so wherever you are on the jaw will determine the size loop you make so I'm pretty far back there and
I'm now going to take this tail and bring it up and over and around and up
and over and I'm pushing pretty hard with my finger see how I'm kind of getting a line in my finger that's because I really want to make sure I get
the shape of the plier now my bottom draws in the way so I'm just going to shift it around and continue with my
wrap until it's all the way around
now this is a spot if you are making a chain that we would go ahead and put it in put the next link in and attach it to
it before you wrap it shut but for this first one we're just going to go ahead and wrap it shut you want to hold the
loop still with your chain nose these are nice and flat so they're going to hold it well and not mark the wire do
not do this step with your round nose that will Mar up your wire it will form two dents right there and there hold
still with your chain nose and I actually prefer to hold it still in my
left hand and do the wrapping with my right hand you're going to need another pair of pliers to hold this tail and
wrap it generally people use another chain nose or flat nose or a bent chain nose but if all you have is around nose
that's okay just make sure you grab the tail out at the tip not in here where you can mark it up you're going to bring
your wraps around I generally do two or
three and I already see a little boo-boo here but that's good so I'm going to show you how to fix it so I've got my
wraps and I'm going to come in with my
flush cutter and trim right there now
notice the angle I'm holding with my cutter if I came in on top like this it would leave a little bit poking out and
I'd have to come in and burnish it down with my chain nose sort of squeeze and
squish it down but if you come in properly with your cutter and just snip right there right there you won't need
to do that other step so can you see here that on my loop my wraps are
shifted down a little bit that sometimes happens which I'm glad it did so I can show you how to fix it I'm going to come
in with my chain nose and put one side in the loop and one side just under that
cheat a little bit by squeezing to pull them up nice and tight here's a nice
close-up of my finished loop with the wraps now we are going to do the second half
so before where I had said that I work right off of the spool or coil you
actually might want to consider just cutting a big long piece of wire like this because we're now at the point
where we have to put a bead on and if you're on the spool or the coil you're
not going to be able to slip your bead on unless you remember to slip it on first which I always forget to do so I'm
working with about eight inches of wire here and I'm going to slide my bead on and wrap my second half so I've just
slid a pearl on now for the second half you're going to come in with your chain
nose and hold the wire just above the bead with the tip of your chain is where
your chain nose is about one to two millimeters thick and that will vary according to which style chain nose
you're using but online it's about there you see that what I'm going to do here is make a bend and that's going to be
the spot where my wraps lay so you want to make sure it's about equal in size to
over here so again just like before you're going to come in with your round
nose and place the round nose at the bend and on top make sure you're using the same side size on your plier that
you use before for equal size loops so I'm down at the base again and I'm going
to take this wire and pull it up and over shift my pliers out of the way this
sides a little easier because I have so much to hang on to now right there my wire had shifted up on my pliers to here
I want to make sure to put it back to make a nice even loop sorry about that
all right okay again if I was inserting another
link this would be the point where I would do that before wrapping it and we'll go over that in a sec so I'm going
to hold it flat this wire so long that I can just wrap with my hand rather than
another set of pliers I'm pulling pretty tight here to get it on there nice and
tight and one last little half turn there come in with my flush cutters I
really like these Tronics because of that pointed tip where I can come into a nice tight spot and snip and if your
wire is poking out at all you can sort of see it there it's a better angle come in with your chain nose or your bent
chain nose and squeeze it down just a tiny bit and be careful that you don't
scratch the bead so right there squeeze okay so one down let's start forming a
chain with these okay so let's do it
again now just a little bit quicker and I'm going to show you how to interlink them to start forming your chain so
again right up here about an inch I'm going to bend it down come in with my round nose and place it right at the
bend they're far down on my round nose my tail goes up and over and shift my
round nose out of the way bring that tail through right there
sometimes you have to give it a little rock sometimes if you've gone off-center and come in with my chain nose wrap that
oh no there see I almost did it I'm so glad I made that mistake let's put this
in first yeah now we're talking so just slide it in there see I'm hanging off
the end now you want to wrap it so come in with your chain nose and if you have
to hold both of them that's fine but on this one I can just let that guy dangle out of the way sometimes if your loops
are smaller you have to clamp down on both of them but I'll let him just sit over there and I'm going to wrap right
here holding it and my chain nose grabbing my tail and come up and over
some people just twist all around I tend to just come up and over up and over up and over getting them nice and tight and
next to each other like a tight coil and now coming in with my cutter and
trimming okay done it again though here
my wrap got a little low so I'm just going to tweak it up there now for this
link I'm going to add a crystal and wrap
the second half as we did before coming in with the chain nose holding it at about thickness of my chain nose one to
two millimeters make my bend coming with my round nose right at the bend you have
to be a little more careful on this side because the crystals are pretty fragile you don't want to accidentally bonk them
with your tool bring it around and now
we switch back to the chain nose to hold it still I've got nothing to insert here
yet so I'm going to go ahead and wrap it one two picture my coils are tight and
three come in with my chain nose to snip it
right about there okay yes cut that with your cutters not your chain nose sorry about that and now
come in with your chain nose for that last little squeeze it's hard to get
that one cut properly on the second side so right here a little tuck and be real
careful not to hit your crystal so here we are so far two links down and I'll do
one more so you can really get a good grasp okay so let's now show one more
link and I'm going to show you how to attach the clasp which is really nothing very different than what we've been
doing but let's start with the bend and coming with our round nose bring that
tail up and over and shift my plier and bring it around sometimes I do a little
kink there remember you're always going to be finagling and finessing here to get that perfect it's not going to come
around perfect the first time and just by wrapping it I don't always get it right sometimes I have to move my plier
and tweak it a little bit and that's okay now actually I'm going to do this
side here I'm going to insert this just let it click in there hold with your
chain nose right there now grab and wrap
I come around two to three times come in with my cutter trim and I'm on the side
now with the Pearl so let me add in a pearl here and make my second loop start
here with my chain nose Bend and with a
big part of my pliers round nose here to make sure I get the right size
actually I'm shifted off a little bit see how I'm kind of out here you need to make sure you're right there in that Bend bring it around and bring that tail
around okay now for this end we're going
to put on sorry the loop end of our toggle I'm just going to slide it on
there kind of click it into place and then wrap like we did before flip it
around and right here we're going to just finish it off with our wraps
okay and get in with our cutters as
close as we can snip and burnish it down
if we need to for this step a lot of people really like to use the bent chain
nose because you can get into these certain spots you know real easily I'm
just used to using my chain is so I'm just going to come in right there okay
so there we are so far we're plugging along I want to show you a finished one here so I can point out that when you're
making your chain with this toggle it's pretty small so make sure that you end
your t bar side with a crystal it doesn't matter what you end with over here that this part can be a crystal or
a pearl but you're going to need the crystal because it's nice and small it'll allow the T bar to pull up and
through your toggle clasp if there was a pearl there it might be too big to pull
up and through and you won't be able to complete your clasp
let's now work on making the earrings take a second now and make sure you watch and practice the free demo that we
have on perfecting the wire spiral go ahead and work on that and then come on back and we're going to work on making a
spiral at the bottom here which were then going to turn into a head pin add on a couple beads and do a wrapped loop
there we're going to make both sides of that and then I'm going to teach you how to make an ear wire there out of 20
gauge alright now that you have viewed the free demo on spiraling let's make a
little spiral here at the end of our 24 gauge and I just cut about a foot and a half off of my coil so I have a workable
piece of wire come in with the very tip of your chain nose grab the very very
tip of the wire just the smallest bit you can get and bring it up and around
so it's like a little pink now coming in with your chain nose you're going to
smash that in and then hold that flat within the jaw your pliers and spiral
around it now I'm going to come around two or three times just remember how
many times you went so you can duplicate it for the other earring let's go around
three times now right before I complete the other side I actually come a little
ways out and form my kink so that when I come up here and continue my spiral it
rolls right up over that to Center it okay now we're going to put our beads on
let's see I'm going to go crystal then
pearl
bring them down
and form a wire wrapped loop on top of that so coming in right here with my
chain nose for my bend come in with my
round nose right at that bend and bring
it up and around sorry there's another
airplane can we just ignore that I think so right there and then we're going to
wrap by holding it flat within the jaw of your chain nose plier I like to flip it over because I prefer to wrap with my
right hand and lay the wraps right there
okay and let's trim now like I said before you're probably going to almost
always do some problem solving now right
there I cut pretty long I'm going to see if I can recut that and just turn that
little bit off again with my cutter and burnish it down with my chain nose now
take a look at your loop and see if you're happy with it mine is off a little bit on the side so
I can come in right here with my chain nose and Center it and that looks pretty
good to me so go ahead and make this one and the other side as well let's get
started making the ear wires you can see them here we're going to do a basic loop at the bottom and a nice big round loop
to go through the ear and a little kink that helps it from falling out so what
you want to start with first is you want to cut your wire to about 3 inches this
is your 20 gauge dead soft wire you can also use half hard for this wire because it already has a little bit of spring
and strength to it to help retain this nice ear wire shape we're going to start
with dead soft and I'll show you how to harden it so the very first thing you want to do is make a loop at the bottom
of your wire take this opportunity to view our free demo on making basic
so you can master that before moving on here because I'm going to go over it pretty quickly very first thing you want
to do is get a flush cut on the end of this wire so take your flush cutter and using the flush side of your flush
cutter trim that little bit off so you have a nice flat cut here now come in
with your round nose and we're just going to make a basic loop so grab the wire in between the jaws of the plier
you don't want to feel it poking up at all it's poking up just a tiny bit it'll make a teardrop shape so it needs to be
down within the jaw the pliers I push the wire against my plier with my thumb here and roll away from me this finger
is sort of just resting here but don't let it push against the plier or get in the way so here we go I'm just going to
roll away from me loosen my grip so I can come back and continue that rotation
as many times as you need to until it comes around and touches making a P so
now I need to kink that P to the side to Center it you can do that with your
round nose if you're working with thin gauge with a thicker gauge you're not going to have enough strength in your
round notes you're going to have to come in with your chain nose let's just do it here since I've got this guy here grab
with one side of the tool in the loop one side right on the outside right there and can't get to Center it so it's
like an eyepin now
now we're going to put on a crystal
now what we need to do is form this kink
right here see how we have the loop and the crystal and then it sort of kinks out and then goes into our curve there
typically if we are working with a bigger bead or a thinner wire we could just grab it and push the wire this
direction but it won't work with this thick of a wire this is 20 gauge and
this fragile of a bead so you're going to have to come in with your chain nose and grab it about a half a millimeter
higher than the bead if you grab right
next to the bead when you go to kink it you will bite your tool up against the crystal and crack it so you need to be
like the tool widths lengths away from the bead and crack that crack that to
the side now we're going to come in with either a
thick Sharpie pen you can use this to form that loop do that with this one or
on the next one we're going to use another little handy tool but for this one I'm going to hold it right up against the Sharpie pen and pull the
tail up and around to form my my nice
little curve there now if you find this is too long come in and trim it a little
bit and with your chain nose grab it and
give it a little bit of a kink so there's one ear wire some people prefer
this to be a little bit smaller in which case you can use a thinner pen um yeah
so this little loop right here has opened up a little bit I'm going to show you how to make sure that's nice and closed just grab it and wiggle it back
and forth as you close it kind of like closing a jump ring so let's do the other one real quick and I'm going to
show you a different tool to use besides a pen let's start with a flush cut
come in with the round nose grab it between your pliers using the same spot that you did with the first side mark it
with a sharpie if you feel you need a little reminder there roll away from you loosen your grip bring it back continue
until it touches see it's touched there and since you're already here with your
round nose you can just rock it back and kink it now let's put on our crystal
give a little kink right here sorry okay
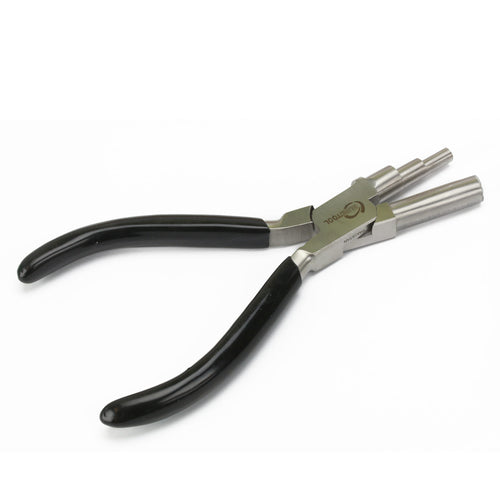
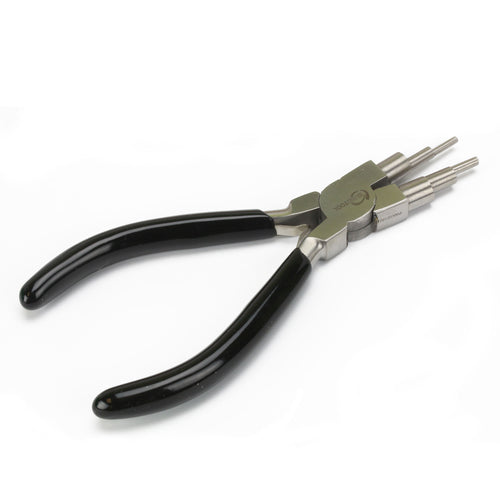
right there now this is my latest favorite tool this is a medium wrap and
tap and you can see it's a stepped round nose plier with different thicknesses here I'm going to use this thickest spot
on my plier to make the part that's
going to go through the ear so I'm just going to hold it like that it's sort of like we did with the
sharpie I'm just going to pull this around all the way around pushing nice
and tight that too gives you a nice curve so it looks like maybe three
inches was a little bit long for this people like the length of the tail here
to be different that's just design element really it's what you prefer I seem to be cutting about a half an inch off either one so I
could have maybe done my initial cut it two and a half inches rather than three take that little kink right there so
here's my pair they're looking pretty good now you want to make sure that you
have a lot of strength here so that as you put the earring in and out you don't lose that shape this is pretty soft
right now so to insure that I'm going to use my bench block and I'm going to
hammer right here which will work hard in this curve of my ear wire if I wanted
to hammer it but didn't want to change the shape I would use a nylon mallet
like this this will harden it but it will not change the shape so there's
definitely more springy now less likely to distort or you can come in with a
chasing hammer this will flatten it a
little bit you don't want to flatten it too much or it's uncomfortable in your ear but it does harden it even more than
a nylon mallet or rawhide mallet so that's very springy okay just to
complete this guy all we have to do is come in oops not your round nose use
your chain nose to hold the tip of that loop pull it open that way like you
would a jump ring don't do it like this because you'll distort it you more want to do it like that so pull it open
insert your drop your charm whatever you're putting on your ear wire and
close it by wiggling it back and forth letting that wire scrape against the
opposite side to make sure it's nice and tight so here's my finished earring I
hold it up or let it hang straight down and notice where everything is facing
and if you look at this my spiral is facing left to right not forwards so I'm
going to have to grab this and shift it a little bit you definitely have a little bit of play that's better with
these guys you don't want to be doing that all day you'll snap it but you definitely can adjust it so there is
your finished earring all nice and hardened we're ready to be worn
all righty we are all done I've given you tons of information this is a great class because you learn a lot about
pliers and different tools and wires and different metals and then we did a pretty cool project so practice a bunch
typically this class is prerequisite for a bunch of other intermediate and advanced wirework classes so by getting
this one under your belt you're ready to move on and step up to some other projects have a great time wrapping it
all up and thanks again for coming by


