How to Make Soldered Jewelry, Episode #9 - Soldered Bezel Set Stone
In episode #9 of our How to Make Soldered Jewelry video series, you will bring together all the tips, tricks and techniques that you have learned in this video series to make this gorgeous pendant. Bezel setting a stone is the next step to take your jewelry to the next level. >> Scroll down for the list of tools.
Thank you for joining us for our How To Make Soldered Jewelry series :)
hi i'm aisha fermanski of everdine jewelry and i'm Lisa Niven Kelly of Beaducation.com we have come together in
this introduction to soldering series to teach you all kinds of good soldering stuff this is the last episode of our
series and we are going to teach you how to bezel-set a stone [Music]
we have finally arrived folks this is all of our hard work come together
to finally learn to set a stone what everybody wants to do everybody wants to do this
right yes but before jumping in if you're new to this series make sure that you start at the beginning if you're
beginning solderer and check out our first episode which is about tools and materials and then we sort of feed you
through of different techniques which leads you to this moment right here right now in the tools and
materials episode we touch base a little bit on the different flow temperatures of solder easy medium and hard and in
this lesson this is when it's really going to come into play we're going to apply it we're going to use it so our
first solder join is done with hard our second one is done with medium our third one's done with soft and then we
actually do a fourth one and we use soft again which was okay it sure was i show you how to use the fire scale
actually in your favor to prevent previous solder joints from flowing in
this class we bessel set a circle so the seam we just put at the bottom but one question we get a lot is if you are
bezel setting an odd shaped stone where do you put the seam do you put it at a point you put on tight curve do you
put it on a long straight away talk them through yeah for sure and really the short answer is that you put it on a
straightaway always put it on a straightaway unless you are putting a bezel around a
teardrop okay so on a teardrop what you're going to do is you're going to bring the bezel wire around you're going to overlap the tip like this
solder it closed remove the excess and then because it's a really sharp
point or corner you're going to file that end down much lower than you will the remaining bezel
wire and that's so that when you go and fold the bezel wire or push the bezel wire over you don't get any pleating or
buckling in those areas cool would you do that as well like a square you sure would you sure would awesome so on the
back plate for this project we just use a ready-made circle just a punched circle but remember you could grab a
piece of sheet and get out that saw go watch our sawing class on beautycation.com and make an interesting
back plate to make it your own super fun yeah this is great project we're excited let's get into it
this is the design that we put together to demonstrate a stone pendant
yeah super cute lisa stamped out two of the clouds and the moon stamp i
sought them out and we pulled this faceted moonstone moonstone cabochon she stole it from my
staff from lisa's stash she just me digging up here this cute little looks like a
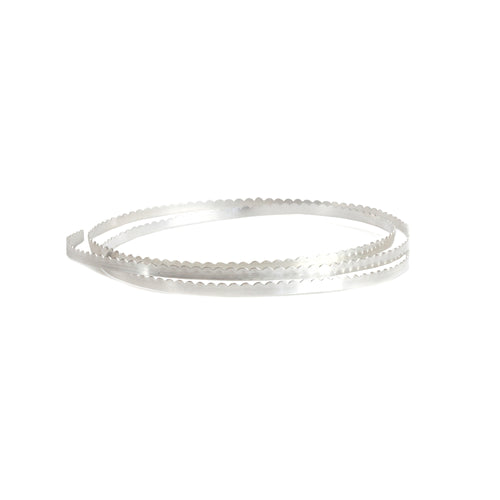
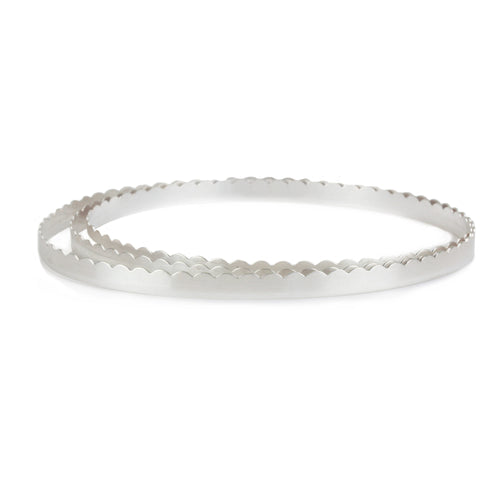
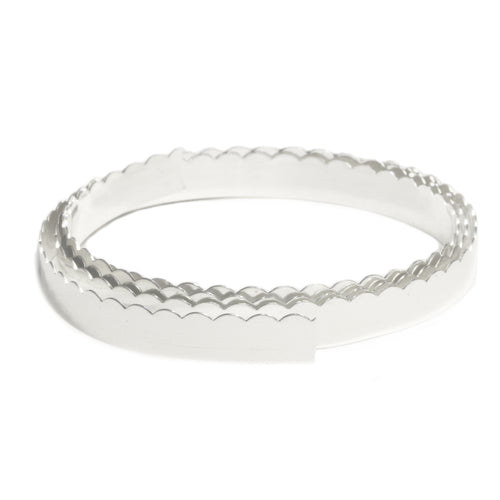
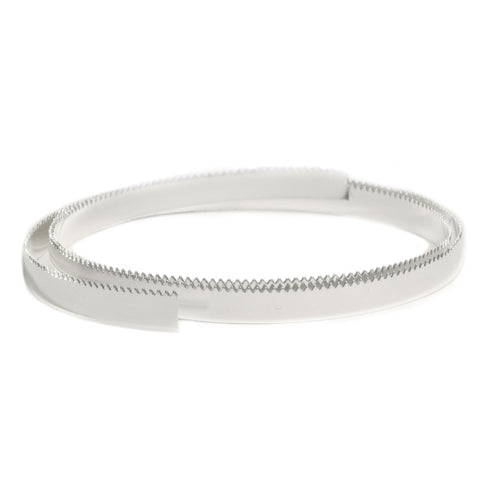
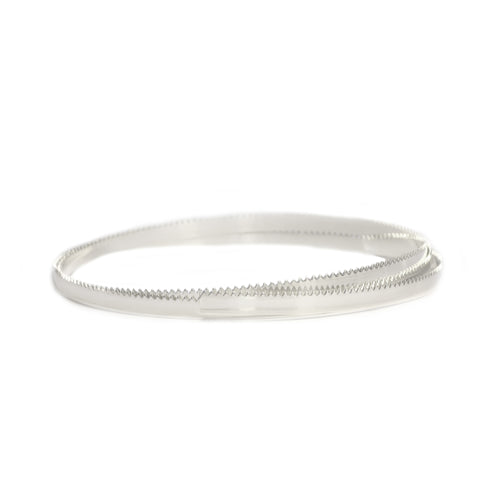
little fence right this is actually bezel wire it's scallop bezel
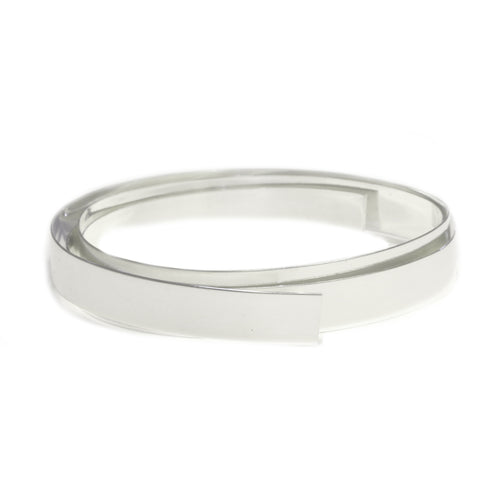
wire and it's in fine silver fine silver is great for bezels for a few reasons one is that it's soft
so when we shape it around the stone and also later when we when we kind of push it over and and form it around the stone
it'll be easier it also doesn't fire scale like sterling silver so it makes it easy to solder together
so now that we know where we're heading design wise let me show you how to form the bezel
wire around the stone the first thing we need to do is start with a really
flat um and straight edge which as you can see here lisa this is not
nope i'm gonna take the flush cutters
and just trim that end and you know what i might as well start fresh with a with a scallop so i'm going to trim off that
kind of because this wire is so soft and thin it's not going to hurt your cutters
that looks straight good one there we go
and then here's a little trick for you when we are wrapping the bezel wire on stone you're
going to wish that you had a third hand not the third hand that we use in soldering but literally a third hand and
the way that we can help ourselves with this is this is just tape
that i folded over on itself and then you put your stone down
and now it'll stay put while you're wrapping the puzzle wire around it i've never done that now i feel silly
it's really helpful if you have um very small very small stones too so you'll notice that i just
absentmindedly did this thing where i i curved this total habit
you want to get the little you know get your shaping kind of started and then
lay the wire down i apologize if my fingers are going to cover here and then we're just going to
start to wrap let's see if i can get my it's nice and tight around the edge of tension
is overlap here oh it's so cute okay so let's see
oh we got lucky right right between here
so you're drawing a line right at the overlap and i take a visual note right here and i go okay i'm going to actually trim
this a little long and then i'm going to i'm going to wrap it around again and then kind of trim it
back until it fits perfectly yeah it's a little safer yeah it can shrink but you
can't stretch exactly cool
flip this over keeping in mind that your flush cutter cuts flush only
see here so you can see
i like to wrap it around again and see how i have a little overlap
see i have partial scallop there on the right i'm going to trim that off okay
because if you did it too big your stone would just wobble around in there you need a nice tight fit
yeah you want a nice tight fit all right this will be good
and if it ended like mid scallop you just just go with it make it work yeah just
go with it don't worry about too much is that a good feeler yeah this looks
great yeah yeah that looks great you want you know if if it's if you're really pushing with all your
fingers to get it to meet like with all your might it's too tight yeah
i'd rather have a little wiggle room um than too tight there are a couple
tricks i can teach you later to stretch a bezel just in case that happens um but for now you know do your due
diligence and and get a nice fit but you do need to make sure those two ends are flush
so if you don't have a good flush cutter maybe you'd get in there with sandpaper or a file or something yeah file would
do that great job all right we are ready to solder this
we need to close the gap before soldering just like we've been learning in this
series right the two ends need to be flat and flush and touching and so you'll see i was passing the two ends
over each other to build a little tension and then cloak keep them together just
like that with bezel wire what i like to do is once i have it together like this
or just give it a little pinch with the chain nose
not really right all right so that is together
let's fire up the torch and get that soldered you'll notice that i placed the pallion
right here below the seam i would like to mention because this happens in my class with my with my
students is sometimes it looks like it's laying on the palliation but they're not actually touching
and it's such small work that it's really important that you get your face really close
and the older i get the closer i have to get my eyeballs um tie that up
to the seam to check it out um because sometimes you'll be heating heating heating and nothing's happening
and it's because they're not actually touching and i see a little black there but that's from the sharpie right yeah
and that's okay that's not going to interfere with our soldering i'm fired up using the max flame
max flame but turned down to a really soft flame yeah this is thin and
fine silver here it'll just go yeah if you yep just like that we're
going to be real gentle and i'm going to come in here and i'm going to spray a little flux
and then just slowly working in a circle heating that sterling bezel evenly
when the solder flows it'll run up that seam and it won't get far scale so you won't
see that like you did on sterling correct that is a soft flame
you know what it's too soft too soft crack it up i'm gonna turn up just a little bit
look at it go and up you know and that was really perfect
because it showed you know how slow and patient we need to be
yeah and how we saw it start to flow when we got to see it come up if things are happening rapid fire
you know like let's say that thing is glowing red hot and the solder comes flying up the seam it's
not it's not ideal because you've overheated the metal which means it'll be brittle we've overheated the solder
which mean it'll be brittle and you know then we have more problems like the seam popping apart
okay i wanted to mention one thing because i think i forgot to mention
that this solder is hard solder yes hard solder yep it's the first solder joint
in a party of solder joints oh i like it a party yeah because we're going to use medium and easy
as well in this project the other thing i want to mention is normally when we're done soldering we
run to the pickle pot to clean up any fire scale i did not do that with this bezel wire
we're actually going to leave the solder joint dirty to prevent it from reflowing while we're
working good one solder will not flow if it's dirty exactly oh
it's not full proof yeah if you're really yeah if you're really pushed it would flow again but it's going to help us a
lot so let's place the stone inside the bezel make sure it fits
look at that there's no big old gaps there's a little space there but that's okay yeah this is
totally acceptable so the next thing we're going to talk
about is the height of the bezel okay you want the
the rule that you're taught in jewelry school is that it's one-third the height
of the stone but that's not really true because it depends on who cut the stone
and like where is that how drastic it the dome is and all these things and so you need to get comfortable just
eyeballing the wire and thinking to yourself okay this is kind of high
and if you know when the time comes for me to push it over there's going to be too much material
and what you'll end up getting pleats you know what i mean like where it folds over and you get wrinkles so you just
want a little bit of metal just enough to push over to hold the stone in and i'm going to tell you this is a
little high can you see that so we're going to sand it down a little bit
this is very fine sandpaper you could use something a little bit more coarse this is 800 grit but you could i mean
you could use 400 grit if you really want to get the job done quickly
place the bezel you know right on your sandpaper and what you want to do is you want to
work in either circles or figure eights so that you're removing an even amount
of material from all you know the whole the whole space if you go back and forth because we're
human you may accidentally just like take a bunch off one side and not the
other okay so
i was taught to do figure eights so that's what i do
it's kind of fun and i stop and rotate yes you're not putting too much pressure on one side
if this was a much worse coarser grit i probably would be done by now
it's cute it's real cute oh yeah that came down quite a bit
is that better yep and we're gonna stick with this and it also made sure the whole bottom of the bezel
is flat yes which thank you for bringing that up lisa you're welcome perfect timing
here's the blank that we're soldering this to so this is the time where you're going to check
and make sure that your bezel is flat and flush to your blank make sure your blank is flat and make sure your blank
is flat and if you need to anneal your blank to flatten it take the time to do that
remember solder doesn't fill gaps so we really need to make sure that this is this looks good and you know what it
does yay that's where you want to look right yep
okay next we'll solder the bezel down to the
blank i have our two pieces set up on the
tripod here on the mesh and the first thing that i'm going to do
is flux the two pieces and you'll notice that i have the bezel flipped
face down because i want to flex the surface that's that's being soldered
let's take up your torch i'm going to apply the flux to the bezel
first
and the blink now that everything is fluxed i'm
going to flip the bezel over onto the blank
you'll notice i'm using my tweezers don't don't forget all this these parts are hot oh yeah right
i'm putting that seam down at the bottom i also like the way you say hot hat my midwestern accent
i'm just gonna move this and get this in and you know exactly
where to put that because you'd already played with design i did yeah we we have those two clouds and uh the moon
and i put that laid that out
so on camera it doesn't look centered but it is i'm actually at this moment looking down
on it like a bird's eye view to really double check
and then we are going to use medium solder pallions to solder the bezel down
to the back plate
and i have cut very small little pallions
and i'm putting them on the inside some people
place their palions around the outside if they're going to then saw off and remove all the metal on
the outside but we want to hide our solder on the inside
and if you do too much solder then your stone may not fit real well right that is true
because then you have all kinds of mounds and excess solder inside there
and you can use wire solder here just cut it really small yeah it kind of rolls right up to the edge
i'm going to use my solder pick to just push all of these pallians out to
the edge
rock couple more
so
now we're ready to rock okay striking the torch
i'm going to heat it from above just for a little bit just to give it a little preheat
now i'm going to work from below cool
so again
here it goes
it did go here on the right side i thought it didn't but it did i can see from the outside edge here
i turned off the torch and we are showing you the side view because i want you to see here
that though the solder was on the inside we drew it out to the outer edge and here you can see it all along the edge a
little perfect line of silver and those palliations they leave those little shadows of where they were placed
originally they'll always be there okay unless you clean them up but they're going to be on the inside so it doesn't really matter
cool
let's prep these pieces to be soldered the first thing we're going to do is apply flux to
our pendant and to the little stamped pieces that we're going to solder on
do the little pieces first
you notice i went you know what yeah the reason i did that is because you probably saw it on camera but
these little pieces get hot so fast that the oxide started coming up and i
so they were a little pink so i was like quick trying to get the flux on there they should be good and now i'm going to add
teeny tiny easy or soft interchangeable here
um pallians one to each
of the tiny accents
okay now i'm going to pre-flow the solder on the little
little accents well i could put the little pallians down on
the piece here and then lay the little pieces on top that would be fine but it feels like juggling six things at once
it sounds scary yeah shift so i'm going to pre-flow the solder so that we know where they are
okay and they won't move that's okay with me okay good
i'm gonna move our pendant out of the way just a little bit so it doesn't get heat that it doesn't need
for these i'm just going to heat from above it doesn't take a lot of heat to get them going
all right now we've moved on to soft center right yep
was it gone you did it yep just like that okay with these little things that just happened so fast
they heat up so fast and now i'm going to place the little accents on our pendant
you'll notice that i placed the little accents on our pendant
right two clouds and a little moon really cute and they are ready to be soldered because everything has been
fluxed and is good to go and i'm gonna heat it like we did previously where i'm going to kind of
lightly preheat it from above and then focus most of my heat from underneath
and it's fine that they're dark on the top because they can be dirty on the top we kept them clean on the bottom you got
it so i'm going to strike up the torch
i'm going to focus most of my heat where these accents are because i don't want to accidentally
reheat or melt the bezel wire here we go
and just like before we are going to know that the solder
flowed when those little pieces drop down to the surface of that back plate
there they go
moon is down [Music] and there they go the clouds
and that was with easy it was with easy and you'll notice that the hard solder on the seam of the bezel
did not reflow and the medium solder that is is holding the bezel down to the
back plate also did not reflow because of those different flow temps because of what we learned in
this soldering series yes it's all coming together yep so this looks really great and now we're going to clean it up
in the pickle pot we're rolling on jerry rolling on
we have the bezel soldered down and the three little accents on the front
we toss in the pickle to clean it up because we need to solder on the bail
you'll notice that i have a nickel here
it's not a joke it's a tip
i'm going to show you here that the bail which is a jump ring
is resting on a nickel to prop it up because otherwise if there
was no nothing for it to rest there it would just fall off is there something else under
there there there is something else there i can't see it in this picture okay here i'm gonna dismantle this okay
okay take off the jump ring ready
so i put down the nickel and it wasn't tall enough when you put down the pin or no first i put down the nickel and it
wasn't tall enough so i'm i added a little bit more height with the t pin oh
because in the previous lesson with the bail we just used the t-pin because it was just the thin blank
but right now it's sitting up on that bezel good so it's pretty tall good tricks to learn so this is our
setup but first what we're going to do is flux our pieces so let's go ahead and do
that and the nickel might melt nope it's just going to chill there
[Music]
i once did it with i once tried it with a penny um pennies melted very low temperature i
learned copper
when i think of nowadays or not even copper
good one and you marked exactly where to lay that
i did so you see a little sharpie marker there
and then i'm going to take a small pallion of easy or you know soft solder
or you can even bump down right to super soft super easy whatever they call it
whatever they call it
so much patience needed in soldering as we've learned okay yeah
ready to rock remember we're not going to heat the bale we're going to heat the blank okay the bail will get enough
residual heat just pretend it's not even there and do not overheat or you're going to lose the stuff on the other side
yes [Music]
slowly but surely
so that extra couple brush brush brush kind of spread it around so you you saw that it it it kind of it
went into a little pool and then i heat a little bit more and then it ran along that edge of the bail
so let's pop this in the pickle and get it cleaned up we went ahead and took the piece out of
the pickle pot we used our choice of oxidizing solution in this case we used
jack's silver blackener with a q-tip with a q-tip and
we i work gloves and then we neutralized it in a baking soda and water
then polish it up with a pro polish pad looks good looks good
i want to pull our focus here at the edge of the bezel
can we see the back real quick sure look at that it's so pretty okay
to our original solder seam it's kind of bumpy and a little ugly
so i think that we should sand it smooth that off so i just have 800 grit
sandpaper here on the sanding stick and i'm going to use the narrow edge of it
can you show between swipes oh sure yeah good
now i should explain to me that the reason she didn't do this before she soldered it down was that she'd be
removing some solder and you might want that solder
so it doesn't like it's super thin and reflow right yeah so if you were to remove all this
solder and then accidentally flow it you you want to have more than less
right can we see again i guess sorry i just get into my groove that's okay yeah it
just covers it can you see it yeah okay it's coming down and getting shiny
so you could also be using silicon wheels
radials radials do it they're more of a polish i would say either sandpaper by hand
sandpaper on a split mandrel
fine sanding barrel on a flex shaft let's see your progress there looking
good will you hold it up mm-hmm i'm gonna blow off some of this
can you see it yeah now would you continue kind of all around the bezel to share whatever
texture you're creating or is it super smooth i'm not going to work around the edge of
the bezel because i don't want to accidentally sand any of this so i'm just going to focus here
you're using such a fine grit sandpaper what do we decide it's like six 800.
foreign
that's good yeah looks good let's move on to setting the stone oh the exciting part yes
i want you to fight the urge to just grab your stone and pop it in your setting don't shove it
because if this is too tight we've committed right
so here's a little a little trick that has been used since the beginning of time the
beginning of dental floss time dental floss lay a piece of dental floss
down loosely place the stone inside the setting
so your point is that if this was wrong you had to do some adjusting you can't get your stone out
without that in there correct and you could also drill a hole in the back sometimes you do that you could drill a
hole in the back so that you would have access to poke it with something but i didn't want to do that with this design
because this moonstone is partially transparent yeah and i don't want to see a hole through the stone so
um this dental floss works well when you're ready to pull it out just
pull it out just like that i know that we're good to go so we're
just gonna commit put it in do it let's get out our setting tools
let's go ahead and set this scallop bezel wire down final step yes very exciting
how we're going to do this is you're going to or i'm going to um slightly push down north south
west and east when doing this i'm not going to go for the gusto what that means is
as i push here i'm just i'm pushing it down like at 45 degrees i'm not going
all the way down to the stone yet makes sense a little bit at a time we're essentially what we're doing is we're
tacking the stone down are you pushing on the scallop or the whole thing
um the whole thing and then rocking up towards the scallop okay
now we have the four points tacked and now you're going to go between those
four points so here corner and i'm going across
it is and then i'm going across to push
and then do the next the other two corners we noticed on my square bezel pusher
there that it was a little scratch so we cleaned it up the face of it we really sanded it so it's nice and shiny
because you don't want to transfer any scratches onto your bezel let's be honest now i've lost track of
where i am that's okay but you know what it's okay i've tacked down four eight spots
let's be honest and you know what if i can't tell that's then we're good to go right i did notice here this isn't
tacked here so let's push that one over now that everything is tacked i'm gonna
work around in a circle okay okay
and you go in that direction so you don't end up like pushing the whole thing over to one side accidentally
exactly thank you for bringing that up yes oh it's so cute
let's see i'm rocking forward yeah and now you're you're really pressing right
um i'm actually not pressing that hard it's fine silver so it's really soft
and those little scallops they kind of want to lay down on their own so good little scallops
but i do want you to take note how i'm rocking now the scallops are actually on the
surface of the stone
perfect height that it's really funny because i had the thought where i went oh we have to talk
about if the too smooth so if your rocker skips
sometimes that can be detrimental to your piece so if this was a very soft stone like a turquoise
and your rocker skipped and you caught an edge you could scratch the surface of your stone
careful yeah be careful the other thing you can do is i'm sorry my hands we've been working all day and they are not
pretty but you can use your finger as a block yes you would run into your finger
but in some say you would save the stone you can also
use painters tape and just put a layer of painters tape on the surface of the stone
so i have definitely gone around all the way around
this is looking pretty cute you can't keep it oh man
so this is looking pretty good i do want to bring in the
burnisher really quick because if you don't use scalloped wire you're
probably going to want to smooth it over even more and this is the curved burnisher
and what you would do is you don't want to rub the stone right and this is a little hard
to get this angle on camera but i'm going to show you here and you just go along
burnishing with this steel tool and is it just pushing it down and kind
of making it a little smooth the easiest way to describe it is is
that this is a high polished steel and this is a very soft
fine silver and so the hardened steel is
smoothing over looks like steel shot yeah
smoothing it over
so [Music]
could you have done all this before patina in sure
that looks nice it really brightens up those edges doing this burnishing and gives a little
sparkle will it pull out tiny scratches
smooth them over i think the word is smooth in them smoothing them up mm-hmm good technical
term wow looks great
that looks good
and we're done [Music]

