How to Make Soldered Jewelry, Episode #2 - Sweat Soldering
This is Episode #2 in our How to Make Soldered Jewelry video series. In this video we show how to sweat solder two flat pieces of metal. We also show you how to anneal metal. >> Scroll down for the list of tools.
hey there I'm Lisa Niven Kelly for
Beaducation.com and welcome to the
first project episode in our
introduction to soldering series now if
you haven't watched the very first
episode that's where we talk about tools
and materials and we really get into it
so make sure you check that out before
this one but in this one we're going to
talk about Sweat soldering and that is
when you take two flat pieces of metal
and solder them together in that first
episode we talked about the golden rules
of soldering and one major golden rule
is to make sure that your metals are
totally touching the solder will only
connect where it's touching and because
of that in this episode we also talked
about annealing and annealing is when
your metals really hard hit it with the
torch like I'm going to show you and it
relaxes it now the reason I put those
two together is because in this class
when we go to put the two pieces
together one is a little bit warped so
you have to flatten it and it was pretty
hard and I couldn't get it to flatten so
I kneeled the metal and then it easily
flattened so I'm gonna talk about Sweatt
soldering we're gonna talk about a
kneeling but the first thing we're gonna
do is just flow solder we're not gonna
solder anything together we're just
going to put some solder on some copper
and see what it feels like and what it
looks like to just get it up to
temperature and let it flow
[Music]
we're gonna practice just flowing the
solder and throughout these lessons
we're going to be using a spray on flex
but I thought for fun I'd show you the
Handy flux which comes on more like a
paste mine is kind of old so it's really
thick but you can water it down and
apply it with a brush or with this for
this I'm just going to put it on a small
amount of area and then I'm going to
apply replace my little payin Boop and
then we're just going to melt that and
see what it looks like just flowing
so again this is something I want you to
do over and over again just to get a
feel for how hot it needs to be my flame
is about two inches above the piece and
I'm just hitting the outside and there
is the flux it's going to turn a little
glassy just hit the outside of the metal
because the heat will travel in it's
gonna flow pretty soon
starting to go and see that
yes
you can see how quickly it flows and
this will all depend on you know the how
how you have your flame how thick your
metal is and this is really interesting
because you can see the bright copper
color that's where the flux was because
it protected it from the copper oxides
coming up and it kept it nice copper
color and the outside got the the fire
scale which is very easy to clean up in
the pickle here's some fun pieces that
have been sweat soldered this is just a
basic sterling stamped piece that we
soldered a little brass heart on so cute
this is a copper piece we have the
initials and then the middle s there is
brass it's been soldered on and actually
was a charm we cut the top off of it and
filed it off just to use it as a
singular s it's kind of cute and on this
one we used the sterling silver circle
in the back and then copper heart
sterling k so you could solder the
copper heart on first clean it start all
over again - then put the K on in two
steps with two different flow Sauter's
but on this one I actually used medium
solder laid it between the copper heart
and the sterling doc and then laid the
cave right on top of it with medium
solder everything stayed really well and
I just soldered it all at once it worked
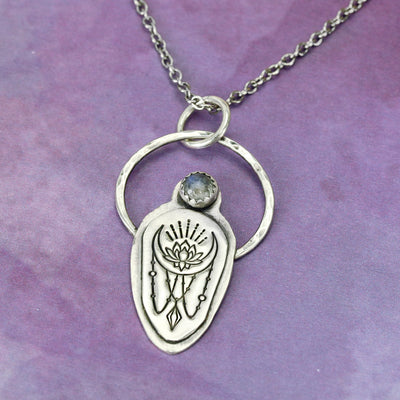
out great okay so here's my plan on this
beautiful little stamped circle I am up
to solder this heart right in the middle
it's a crazy reflection there but they
need to be flat so that they can get a
good join you can see they don't touch
because this guy is pretty warped it not
happens when you stamp especially around
the outside so all you need to do is
flatten it sometimes you need to anneal
it to get the metal to really flatten
but I'm hoping that I can just use my
plastic mallet or a rawhide mallet and
Hammer it too flat so you need to make
sure that your bench box bench block is
super clean and smooth with no nicks in
it mine is very clean it's just got a
little rust but that doesn't matter so I
could just flip it down and hit with the
plastic mallet because this is clean but
if you're worried about your bench block
grab like a thin piece of fabric or I
just have some leather here
and you can put it on that to make sure
you don't scratch up your piece now
you're gonna have an easier time
flattening it by facing the edges down
this way then rather rather than having
them point up like that that makes sense
so I'm just going to flip it down and
hit it a bunch of times now because this
is sterling it's a pretty hard metal I'm
not really able to get it very flat I
could keep trying but I actually want to
show you annealing so we don't leave it
at that if I was able to get it flat and
get this flat we could move straight on
to soldering but instead let me teach
you how to kneel this metal to soften it
so that then when I try to flatten it
again it'll easily easily flatten to
anneal this metal these are the tools
and all the goodies that you need from
your soldering list that we talked about
in the first lesson and the only reason
we've got our Cooper nail here which is
a flux is not because we need it to help
our solder flow so we're not soldering
just yet but by spraying it on this
piece before we Emil it's going to help
protect it from the fire scale so really
what it means is it's going to be less
cleaning after we anneal this piece on
this one I am going to use the flux that
we talked about to keep it from getting
too much fire scale but I'm not gonna do
it on this one just so you can see the
difference cool
so I'm gonna turn on my flame I've got
my goggles on maybe I'm not go
and I want my flame let me come in here
you can't see really well but I've got
it a little pullback I don't have it
full max you can tell by the sound or
I'll show you the button as well I don't
have it turned all the way up there I
have it pulled back a little bit so it's
not like a crazy big flame I want a
neutral flame and to add the Cooper nail
I'm just going to get a little bit warm
maybe I'll do the other side as well
see how it's already changing colors
pulling those copper oxides up to the
surface
so I'm going to come in with my flame
and again because of the contrast you
can't really see it but see how it's
changing colors here and it's starting
again
all this kind of pinky salmony color you
don't want to come into your clothes
just come around around you want to be
very deliberate and very patient and
maybe we're done there now I'm gonna do
this guy and I'm kind of covering it
with the torch
so long
I'm gonna get it pretty warm but not red
mmm that looks good
okay gonna quench it and do the same at
this guy I'm gonna street him to the
edge so I can grab it out of frame sorry
and you'll hear the crunch sound yeah
alright so let me take them out and show
you so now I'm gonna put it in the
pickle to clean it up I or hit it with a
bunch of penny bright and then we'll
come back and flatten it again I just
grabbed these out of the pickle pot and
they will come out looking like this
kind of matte kind of white chalky
that's cuz it's all clean the copper
oxides are gone the silvers come to the
surface and I'm not gonna polish it I'm
gonna leave it just like that
now flatten it and then I can solder it
cuz it's all clean so don't polish it
just leave it exactly like this let's
see the heart is already pretty flat I
probably don't need to flatten it but
I'm gonna leave the design face up and
just give it a couple whacks just to
make sure all right now with this guy
instead of flipping it over I'm just
gonna hit it from the front because it's
super annealed so it's very soft
everybody should go flat without any
issue there we go
before I go ahead and solder this I
wanted to show you that this is what
you're looking for a nice and flat flat
flat against each other it's just like
we talked about when we introduced you
to sheet solder we're going to cut these
little pieces of grass probably got a
little longer and then we're gonna cut
our own little pal Ian's here and then
drop them into your little jar to keep
them
so we've got them right there in our
little jar let's pull them out as we
need them here's how I'm gonna do this
I'm gonna first come in with my torch
and lightly heat this these two pieces
are 24 gauge they're pretty thin light
the heat spray with Cooper nil and get
it all nice and coated and I'm going to
turn my torch off and then place
everything in place then turn it back on
and solder
trying to get that all nice and coated
I'm actually just gonna use one palying
because I cut this guy kind of big and
it's kind of perfect
so I'm now gonna take my heart put it
upside down try to get it nice and
centered right where I want it I just
make sure that it's right exactly where
I want it and the cool thing is here the
PAL unit has it kind of lifted you can't
really see if there's a gap over here
but when it's otters the heart will drop
like and that is what I'm now that it is
all soldered
this is where patience comes in slowly
going to heat the outside
I'm not going to concentrate my flame
right in the middle I'm just going to
let the heat flow in from the outside
very patient my flex will protect it
I'm a little hotter and it's probably
gonna drop pretty soon I can see it
coming up to red and you see that drop
right there I'm just gonna give it a
little bit of a kiss around the outside
okay I realize you couldn't see the drop
because the purchase of the lace so it
set up just another sample here about my
torch on anything sliced and I'm healing
around the edge
and he will travel in from the edge and
not trying to write on the top
gettin up to temperature and see a drop
right there
other sites to go
the edge that's what we're looking for
so we just pulled it out of the pickle
pot and there's that kind of white
frosty finish that we talked about at
this point I'm going to go ahead and
oxidize it and then polish it up to
leave the black in the grooves to show
the detail the stamping I'm going to do
that instead of polishing it then
oxidize some polishing again so you can
oxidize with your oxidation of choice
whether you moxa dyes with Sharpie pen
or enamel paint or liver sulfur or
hydrochloric acid whichever you prefer
I'm gonna go ahead off-camera and
oxidize polish punch a hole and bring it
on back and you're gonna see this beauty
I am also gonna file that because it's
making me crazy a little bump right
there look at this not too scary you
guys can do this it's all nice and
soldered I have oxidized and polished it
so my hands are all dirty and hung it
from my favorite popcorn chain so it's
your turn what do you say let's go fire
at those torches and make yourself a
nice sweat soldered pendant
[Music]